
Earth 2
Getting Started in Earth 2 E2V1: A Beginner’s Guide to Your First Adventure
So you’ve finally been granted access to Earth 2 V1, loaded into the client… and now you’re staring at the screen wondering: “What do I do now?” If that’s you, don’t worry—almost every…
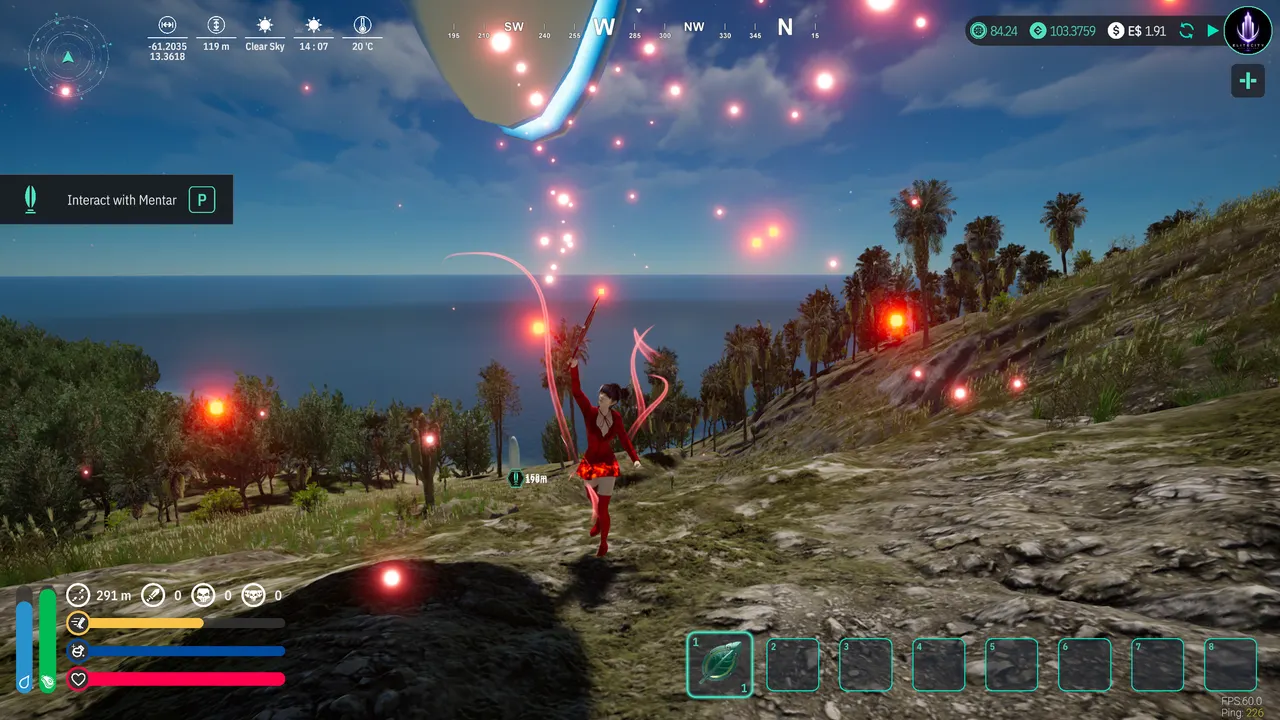
So you’ve finally been granted access to Earth 2 V1, loaded into the client… and now you’re staring at the screen wondering:
“What do I do now?”
If that’s you, don’t worry—almost every new player feels the same way. Earth 2 V1 has a bit of a learning curve, but once you understand the basics, you’ll be searching, crafting, and exploring in no time.
Here’s a simple roadmap to get you started.
Step 1: Learn the Basics
Before trying to figure everything out yourself, spend 20–30 minutes watching a few beginner-friendly tutorials.
Community creator Pacey (Shoon City) has several excellent videos covering:
- Getting Started in E2V1
- How to Search
- How to Craft a Shovel
These three tutorials can save you hours of trial and error.
Step 2: Spawn Your First Avatar
One of the biggest points of confusion for new players is creating their first playable character.
Here’s how:
- Open the Earth 2 V1 client.
- Click your account icon in the upper-right corner.
- Make sure you’re logged into your Earth 2 account in that window.
- Find one of your properties and click “View in E2V1.”
- Once your property loads, click or double-click it until your Mentar appears.
- Interact with the Mentar.
- Spawn your first avatar (the basic starter character).
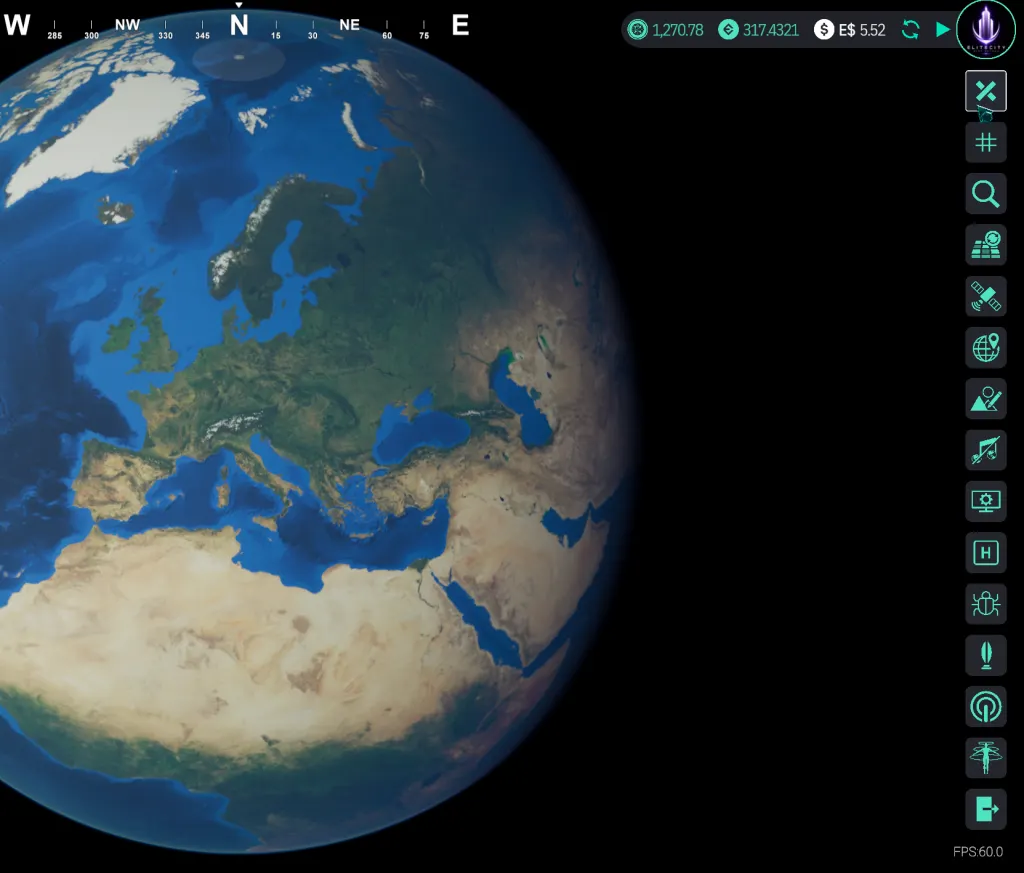
Additionally, you can click the X icon (see screen capture below) to bring up a vertical menu after you log in and get past the tutorial screen. Then find the avatar icon, which should be the second last icon (above the logout icon) to spawn an avatar that has already been synthesized.

Creating an avatar requires a small amount of Ether, so it’s a good idea to keep some available instead of converting every last bit into ESS.
Many experienced players recommend keeping around 500 Ether reserved for gameplay expenses.
Step 3: Learn These Keyboard Shortcuts
These keys will quickly become second nature:
-
- I — Open Inventory
-
- G — Open Crafting Menu
-
- P — Interact with your nearby Mentar, store items, save character
- H – the “H” key opens your Avatar and Equipment Management menu
- M – teleport (teleport implant required or inventory with just skin related items and backpack)
- T — actions such as waving, sitting, etc.
Knowing these from the beginning makes navigating the game much smoother.
Step 4: Never Let Your Inventory Fill Completely
This is one of those tips you’ll be glad you learned early. It is an issue as of June 2026, but hopefully will be addressed by the Earth 2 team in a later update.
If your inventory reaches 100/100, searching won’t collect anything.
Instead, you’ll repeatedly see:
“This tile has already been searched.”
The tile isn’t actually empty—you simply don’t have room to collect any resources.
Try to keep at least one inventory slot free (99/100 or less).
Step 5: Your Early Progression
A simple progression that works well for most new players is:
-
- Learn how to search.
-
- Learn how to manage thirst.
-
- Craft a backpack.
-
- Craft a shovel.
-
- Get the base clothing on (hat, shoes, shirt, pants) and then a skin.
- Begin expanding your storage and equipment.
Don’t worry about crafting everything immediately. Focus on learning one system at a time. Clothing allows your avatar to survive for longer without needing to hydrate. If you are not hydrated, you will die.
Step 6: Choose Good Properties for Gameplay
Not every property makes an ideal starting location.
When deciding where to play, look for areas with:
-
- Nearby water
-
- Plenty of vegetation
-
- Easy access to natural resources
Water is especially important during your first few hours because you’ll become thirsty frequently while exploring. Elitecity (epl: elitecity) has a lot of water around if you’d like to visit there!
If your property is far from water, survival becomes much more challenging.
Step 7: Water Is Your Best Friend
Early gameplay revolves around staying hydrated.
Some helpful strategies include:
-
- Stay close to water while learning.
-
- Save your progress when you’re near your Mentar.
-
- Build a garden once you’re established.
-
- Craft water bottles so you can explore farther away from rivers and lakes.
As your crafting abilities improve, you’ll become much less dependent on staying close to water.
Step 8: Don’t Overlook Cactus
If you’re exploring desert regions, cactus can help quench your thirst, making it a surprisingly useful survival resource.
Step 9: Hunt for Kapok Trees
Kapok trees are an excellent resource for crafting clothing and are worth learning to recognize.
They’re large tropical trees that many players overlook at first. Once you know what they look like, you’ll start spotting them much more easily. Search for these in tropical areas, or, if you would prefer to have them quickly delivered instead, set up a quest for cotton or clothing items.
Step 10: Most Importantly—Have Fun
Don’t worry if you’re still running around in the starter avatar while learning the ropes.
Everyone begins in the same place.
Whether you’re searching for resources, planting your first garden, crafting your first backpack, or simply exploring your properties, every step helps you learn the world of Earth 2 V1.
The game rewards curiosity and experimentation, so take your time, enjoy the journey, and don’t be afraid to learn as you go.
Happy exploring, and welcome to Earth 2 V1!
Creating an avatar requires a small amount of Ether, so it’s a good idea to keep some available instead of converting every last bit into ESS.
Many experienced players recommend keeping around 500 Ether reserved for gameplay expenses.
Step 3: Learn These Keyboard Shortcuts
These keys will quickly become second nature:
-
- I — Open Inventory
-
- G — Open Crafting Menu
-
- P — Interact with your nearby Mentar, store items, save character
- H — the “H” key opens your Avatar and Equipment Management menu
- M — teleport (teleport implant required or inventory with just skin related items and backpack)
- P — Interact with your nearby Mentar, store items, save character
Knowing these from the beginning makes navigating the game much smoother.
Step 4: Never Let Your Inventory Fill Completely
This is one of those tips you’ll be glad you learned early. It is an issue as of June 2026, but hopefully will be addressed by the Earth 2 team in a later update.
If your inventory reaches 100/100, searching won’t collect anything.
Instead, you’ll repeatedly see:
“This tile has already been searched.”
The tile isn’t actually empty—you simply don’t have room to collect any resources.
Try to keep at least one inventory slot free (99/100 or less).
Step 5: Your Early Progression
A simple progression that works well for most new players is:
-
- Learn how to search.
-
- Learn how to manage thirst.
-
- Craft a backpack.
-
- Craft a shovel.
-
- Get the base clothing on (hat, shoes, shirt, pants) and then a skin.
- Begin expanding your storage and equipment.
Don’t worry about crafting everything immediately. Focus on learning one system at a time. Clothing allows your avatar to survive for longer without needing to hydrate. If you are not hydrated, you will die.
Step 6: Choose Good Properties for Gameplay
Not every property makes an ideal starting location.
When deciding where to play, look for areas with:
-
- Nearby water
-
- Plenty of vegetation
-
- Easy access to natural resources
Water is especially important during your first few hours because you’ll become thirsty frequently while exploring. Elitecity (epl: elitecity) has a lot of water around if you’d like to visit there!
If your property is far from water, survival becomes much more challenging.
Step 7: Water Is Your Best Friend
Early gameplay revolves around staying hydrated.
Some helpful strategies include:
-
- Stay close to water while learning.
-
- Save your progress when you’re near your Mentar.
-
- Build a garden once you’re established.
-
- Craft water bottles so you can explore farther away from rivers and lakes.
As your crafting abilities improve, you’ll become much less dependent on staying close to water.
Step 8: Don’t Overlook Cactus
If you’re exploring desert regions, cactus can help quench your thirst, making it a surprisingly useful survival resource.
Step 9: Hunt for Kapok Trees
Kapok trees are an excellent resource for crafting clothing and are worth learning to recognize.
They’re large tropical trees that many players overlook at first. Once you know what they look like, you’ll start spotting them much more easily. Search for these in tropical areas, or, if you would prefer to have them quickly delivered instead, set up a quest for cotton or clothing items.
Step 10: Most Importantly—Have Fun
Don’t worry if you’re still running around in the starter avatar while learning the ropes.
Everyone begins in the same place.
Whether you’re searching for resources, planting your first garden, crafting your first backpack, or simply exploring your properties, every step helps you learn the world of Earth 2 V1.
The game rewards curiosity and experimentation, so take your time, enjoy the journey, and don’t be afraid to learn as you go.
Happy exploring, and welcome to Earth 2 V1!